Home / Docs / Release 0.5.2 / Manage Keptn / Project
Project
Learn how to manage your projects in Keptn.
Select Git-based upstream
Keptn will manage a project in an internal Git repository. To upstream this repository to a remote place, you can create a GitHub, Bitbucket repository or a GitLab project and then tell Keptn where to find it during creating the project, explained below. Select one of the three options and make sure to have the Git user, token, and remote url before continuing.
GitHub
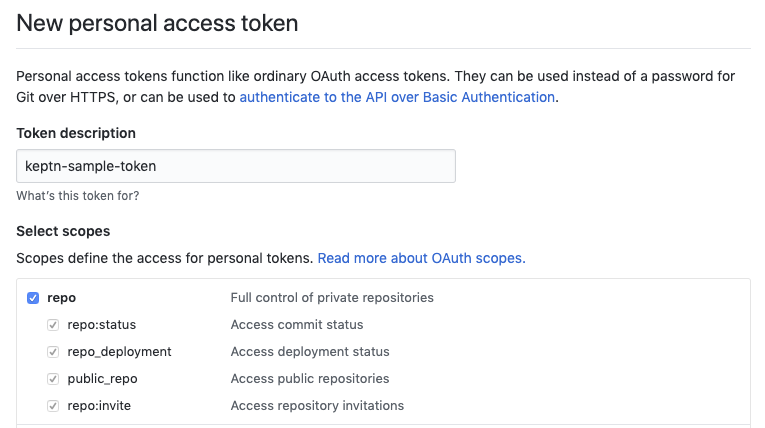
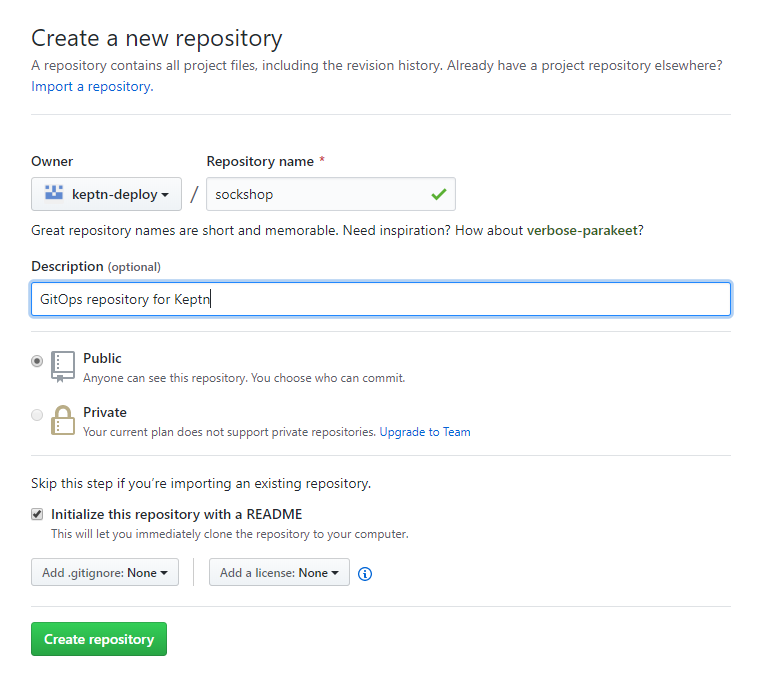
If you do not have a GitHub user, create a user by signing up. Create a personal access token for your user with repo scope: (optional) If you want to use a dedicated GitHub organization for your repository, create a GitHub organization. Go to your account or your GitHub organization and create a GitHub repository. Note: Click the Initialize this repository with a README checkbox to initialize the repository, which is a prerequisite.Create user, token, and repository
GitLab
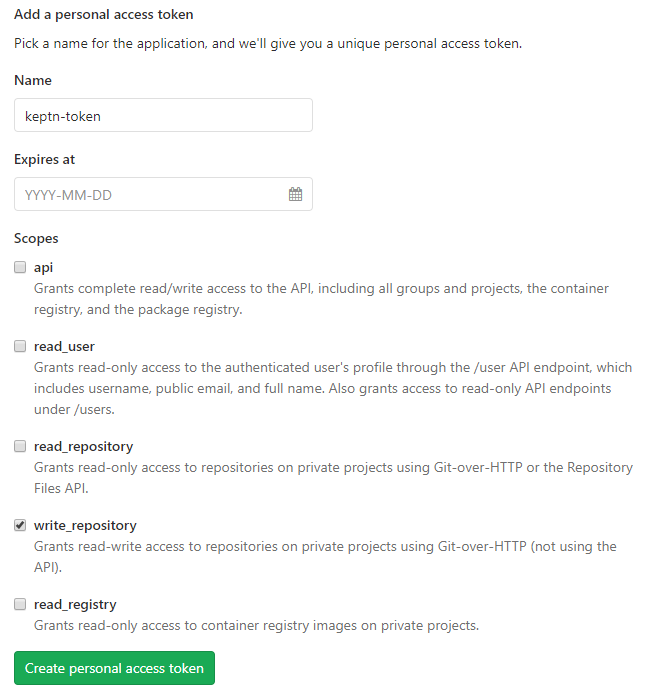
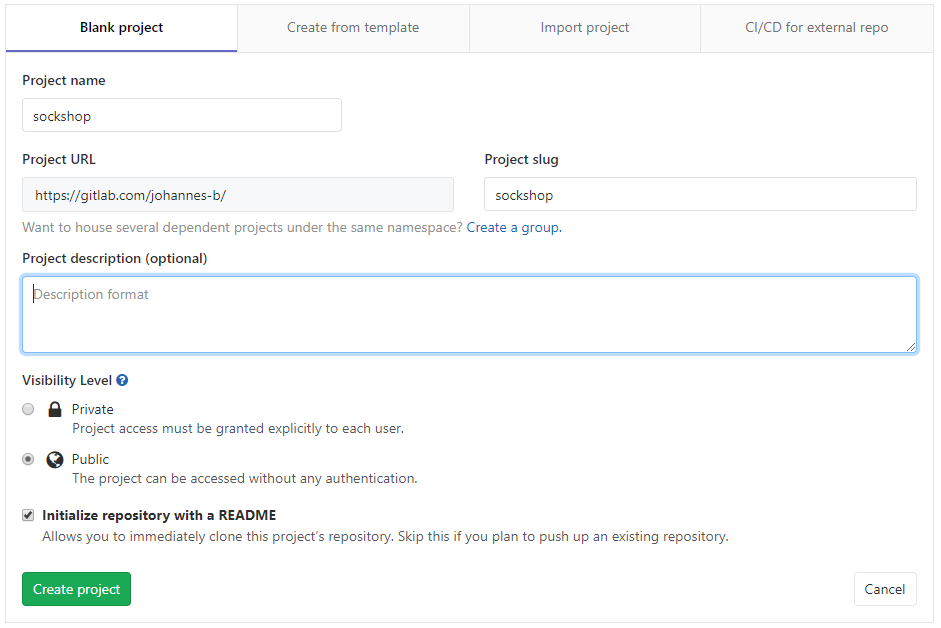
If you do not have a GitLab user, create a user by signing up for a free trial. Create a personal access token for your user with write_repo scope: Go to your account and create a GitLab project. Note: Click the Initialize this repository with a README checkbox to initialize the repository, which is a prerequisite.Create user, token, and project
Bitbucket
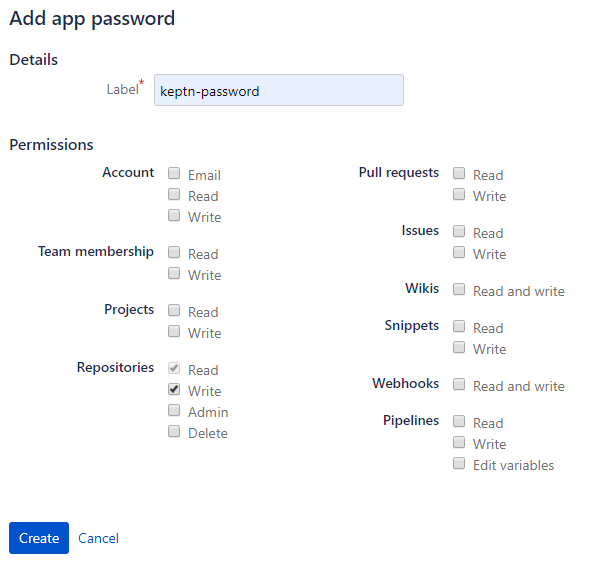
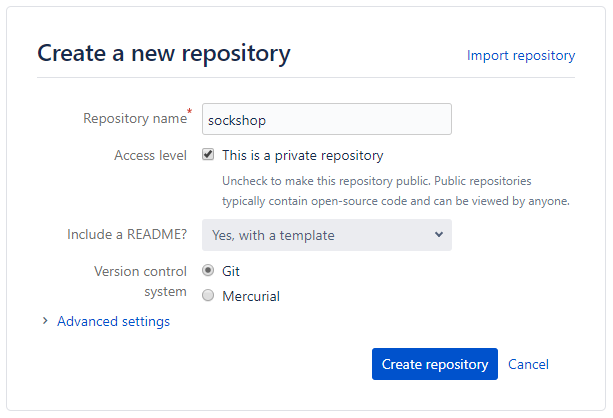
If you do not have a Bitbucket user, create a user by signing up for a free trial. Create an app password for your user with Write permissions. Therefore, select your User > View profile > Settings > App passwords > Create app password Go to your account and create a Bitbucket repository. Note: Select Include a README? - Yes, with a template to initialize the repository, which is a prerequisite.Create user, token, and repository
Create a project
In Keptn, a project is a structure that allows to organize your services.
A project is stored as a repository and contains branches representing the multi-stage environment (e.g., dev, staging, and production stage). In other words, the separation of stage configurations is based on repository branches. To describe the stages, a shipyard.yaml file is needed that specifies the name, deployment strategy, test strategy, and remediation strategy as shown by an example below:
stages:
  - name: "dev"
    deployment_strategy: "direct"
    test_strategy: "functional"
  - name: "staging"
    deployment_strategy: "blue_green_service"
    test_strategy: "performance"
  - name: "production"
    deployment_strategy: "blue_green_service"
    remediation_strategy: "automated"
Note: To learn more about a shipyard file, click here Shipyard specification.
Option A: Create a project with the Keptn CLI without a Git upstream:
keptn create project PROJECTNAME --shipyard=FILEPATHOption B: Create a project with the Keptn CLI using a Git upstream:
keptn create project PROJECTNAME --shipyard=FILEPATH --git-user=GIT_USER --git-token=GIT_TOKEN --git-remote-url=GIT_REMOTE_URL
Delete a project
To delete a Keptn project, the delete project command is provided:
keptn delete project PROJECTNAME
Note: If a Git upstream is configured for this project, the referenced repository or project will not be deleted. Besides, deployed services are also not deleted by this command. To clean-up all resources created by Keptn:
delete the remote repository for your project
delete the Helm releases that have been deployed by Keptn, e.g.:
helm ls
helm delete --purge sockshop-dev
helm delete --purge sockshop-production
helm delete --purge sockshop-staging
- delete all Kubernetes namespaces that have been created by Keptn in your cluster, e.g.:
- sockshop-dev
- sockshop-staging
- sockshop-production
by executing:
kubectl delete namespace sockshop-dev sockshop-staging sockshop-production
Update a project
Updating a project is currently supported by following the steps of deleting a project and creating the project with updated settings again.


