Please upgrade your Keptn to a newer release.
Home / Docs / Release 0.5.2 / Tutorials / Onboarding a Service
Onboarding a Service
Shows you how to onboard the carts service including its database to a Keptn managed project. Besides, this tutorial shows how to deployed a new version of carts via Keptn.
About this tutorial
The goal of this tutorial is to automatically deploy a service into a multi-stage environment using Keptn. The stages of the environment are described in a shipyard file that defines the name, deployment strategy, and test strategy of each stage. In case an additional stage is needed, the shipyard file can be easily extended by a stage definition before creating the project. After creating the project, the service that is going to be managed by Keptn needs to be onboarded. Finally, an artifact of the carts service will be deployed by Keptn.
To illustrate the scenario this tutorial addresses, Keptn relies on following internal services: shipyard-service, helm-service, jmeter-service, and gatekeeper-service. These services have the following responsibilities: shipyard-service: helm-service: Creates a new service entity, manipulates the Helm chart, and uploades the Helm chart to the configuration store. Updates the service configuration when a new artifact is available. Deploys a service when the configuration of a service has changed. jmeter-service: gatekeeper-service:Click here to learn more about Keptn internal services.
Prerequisites
The endpoint and API token provided by the Keptn installation.
Clone example files used for this tutorial:
git clone --branch 0.5.0 https://github.com/keptn/examples.git --single-branchcd examples/onboarding-carts
Authenticate Keptn CLI
If you have not yet authenticated the Keptn CLI, please follow these instructions. If you have already done this during the installation, please skip this part and continue with creating a project.
The Keptn CLI needs to be authenticated against the Keptn server by executing the keptn auth command:
keptn auth --endpoint=https://api.keptn.$(kubectl get cm -n keptn keptn-domain -ojsonpath={.data.app_domain}) --api-token=$(kubectl get secret keptn-api-token -n keptn -ojsonpath={.data.keptn-api-token} | base64 --decode)
Create project sockshop
For creating a project, this tutorial relies on the shipyard.yaml file shown below:
stages:
  - name: "dev"
    deployment_strategy: "direct"
    test_strategy: "functional"
  - name: "staging"
    deployment_strategy: "blue_green_service"
    test_strategy: "performance"
  - name: "production"
    deployment_strategy: "blue_green_service"
    remediation_strategy: "automated"
Note: To learn more about a shipyard file, click here Shipyard specification.
Create a new project for your services using the keptn create project command. In this example, the project is called sockshop. Before executing the following command, make sure you are in the examples/onboarding-carts folder and then select one of the two options:
Option 1: Create a new project without Git upstream
keptn create project sockshop --shipyard=./shipyard.yaml
To configure a Git upstream for this tutorial, the Git user (Option 2: Create a new project with Git upstream
--git-user), an access token (--git-token), and the remote URL (--git-remote-url) are required. If a requirement is not met, go to select Git-based upstream where instructions for GitHub, GitLab, and Bitbucket are provided.keptn create project sockshop --shipyard=./shipyard.yaml --git-user=GIT_USER --git-token=GIT_TOKEN --git-remote-url=GIT_REMOTE_URL
Onboard carts service and carts database
After creating the project, services can be onboard to this project.
- Onboard the carts service using the onboard service command:
keptn onboard service carts --project=sockshop --chart=./carts
After onboarding the service, a couple of tests (i.e., functional tests and performance tests) need to be added as basis for quality gates in the different stages:
- Functional tests:
keptn add-resource --project=sockshop --service=carts --stage=dev --resource=jmeter/basiccheck.jmx --resourceUri=jmeter/basiccheck.jmxkeptn add-resource --project=sockshop --service=carts --stage=staging --resource=jmeter/basiccheck.jmx --resourceUri=jmeter/basiccheck.jmx- Performance tests:
keptn add-resource --project=sockshop --service=carts --stage=dev --resource=jmeter/load.jmx --resourceUri=jmeter/load.jmxkeptn add-resource --project=sockshop --service=carts --stage=staging --resource=jmeter/load.jmx --resourceUri=jmeter/load.jmx
Since the carts service requires a mongodb database, a second service needs to be onboarded.
- Onboard the carts-db service using the onboard service command. The
--deployment-strategyflag specifies that for this service a direct deployment strategy in all stages should be used regardless of the deployment strategy specified in the shipyard. Thus, the database is not blue/green deployed.
keptn onboard service carts-db --project=sockshop --chart=./carts-db --deployment-strategy=direct
During the onboarding of the services, Keptn creates a namespace for each stage based on the pattern: projectname-stagename.
- To verify the new namespaces, execute the following command:
kubectl get namespaces
  NAME                  STATUS   AGE
  ...
  sockshop-dev          Active   2m
  sockshop-production   Active   30s
  sockshop-staging      Active   1m
Send new artifacts and watch Keptn doing the deployment
After onboarding the services, a built artifact of each service can be deployed.
- Deploy the carts-db service by executing the keptn send event new-artifact command:
keptn send event new-artifact --project=sockshop --service=carts-db --image=mongo
- Deploy the carts service by specifying the built artifact, which is stored on DockerHub and tagged with version 0.9.1.
keptn send event new-artifact --project=sockshop --service=carts --image=docker.io/keptnexamples/carts --tag=0.9.1
- Go to Keptn’s Bridge and check which events have already been generated. You can access it by a port-forward from your local machine to the Kubernetes cluster:
kubectl port-forward svc/bridge -n keptn 9000:8080
The Keptn’s Bridge is then available on: http://localhost:9000.
It shows all deployments that have been triggered. On the left-hand side you can see the deployment start events (i.e., so-called
Configuration changeevents). During a deployment, Keptn generates events for controlling the deployment process. These events will also show up in Keptn’s Bridge. Please note that if events are sent at the same time, their order in the Keptn’s Bridge might be arbitrary since they are sorted on the granularity of one second.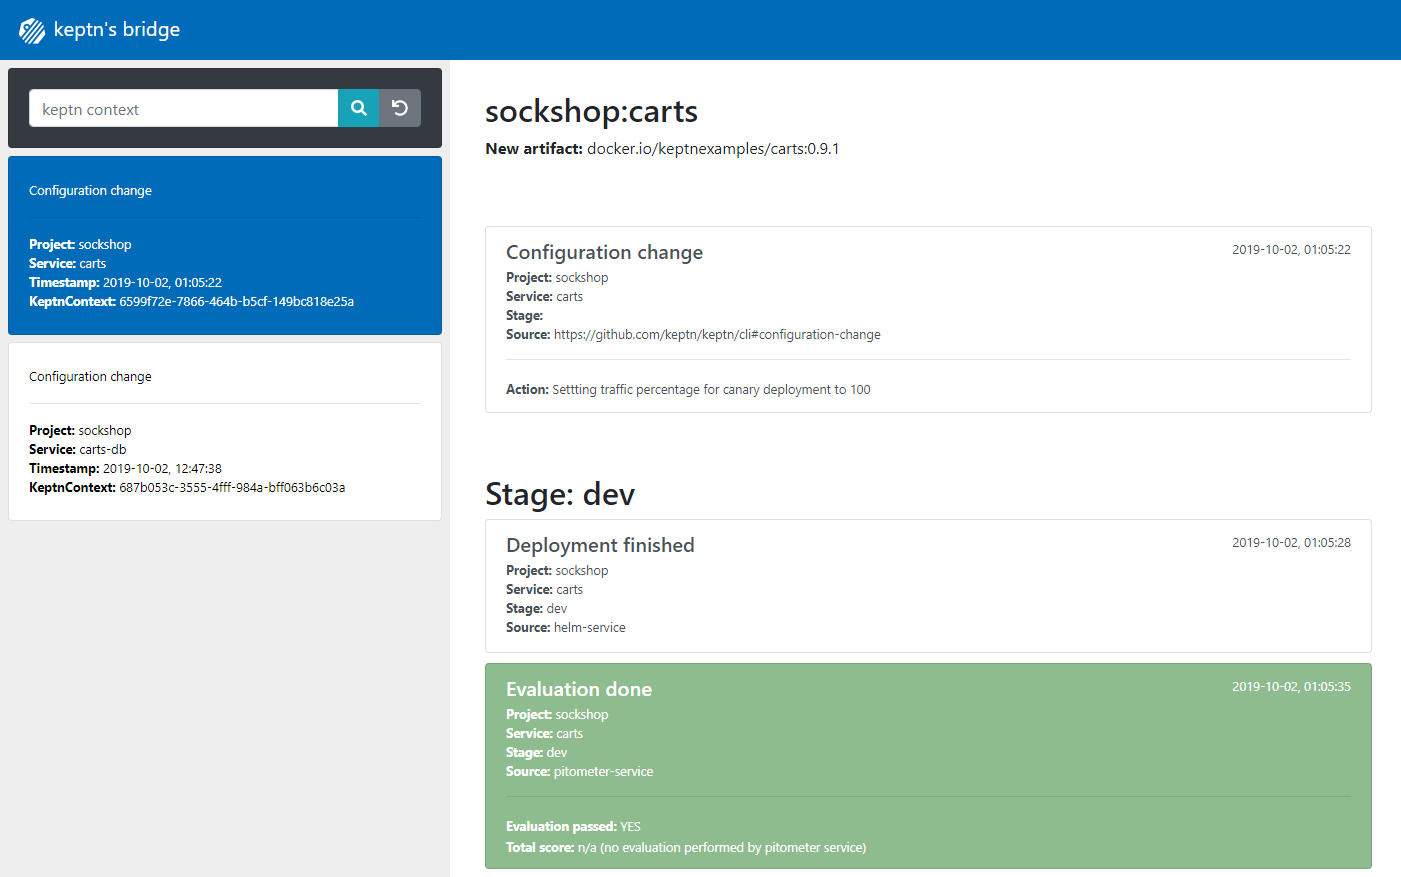
Keptn's Bridge
View carts service
- Get the URL for your carts service with the following commands in the respective namespaces:
echo http://carts.sockshop-dev.$(kubectl get cm keptn-domain -n keptn -o=jsonpath='{.data.app_domain}')
echo http://carts.sockshop-staging.$(kubectl get cm keptn-domain -n keptn -o=jsonpath='{.data.app_domain}')
echo http://carts.sockshop-production.$(kubectl get cm keptn-domain -n keptn -o=jsonpath='{.data.app_domain}')
Navigate to the URLs to inspect the carts service. In the production namespace, you should receive an output similar to this:
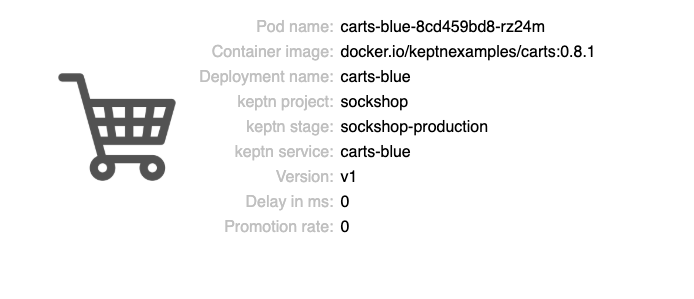
carts service in production
Built with  by Dynatrace